PACKOUT Shop Storage
Milwaukee PACKOUT Workshop Storage
Tool storage and organization don’t stop at the job site, it naturally carries into the workshop. Workshop organization is an ongoing process, that requires good habits, and is best achieved with systems in place that help you maintain your organizational habits. The Milwaukee PACKOUT Shop Storage is one of these systems.
PACKOUT Shop Storage | Overview
The backbone of the PACKOUT Shop Storage is the wall mounting plates. Coming in two sizes, large and small, the wall plates take the familiar indexing tabs found on all PACKOUT accessories and mount them vertically on the wall. The plates have reinforced mounting plates and are designed to index next to each other and allowing for a full wall mosaic of mounting tabs for existing and new PACKOUT accessories.
Favorites like the PACKOUT organizer boxes can now be mounted vertically on the wall. But to take full advantage of the mounting system, Milwaukee has released a full lineup of wall mount storage solutions. Some of these items like the Tool Station or the Roll Holder are intended to be semi-permanent fixtures on the wall. While others like the Small and Large bins have been designed to mount on the wall as well as easily fit inside existing PACKOUT boxes.
PACKOUT Shop Storage | Parts
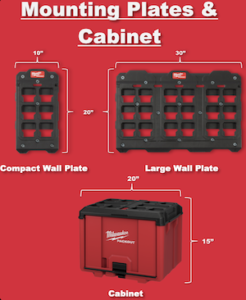
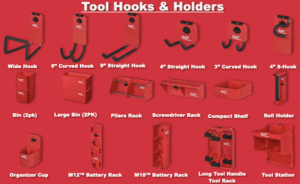
When the PACKOUT Shop Storage system launches there will be 20 different items that can be purchased separately. A comprehensive list is featured below.
PACKOUT Mounting Plates | Overview
The PACKOUT Storage System is designed to be mounted on a wall in the garage, workshop, in a trailer, or truck. The system currently has two durable and versatile, wall mounting plate options:
- Compact Wall Plate [10″ x 20″]
- Large Wall Plate: [30″ x 20″]
The mounting plates are constructed with impact-resistant polymers, with metal reinforced mounting holes that allow screws or other fasteners for securing. The plates also have tie-down points to secure items to the Mounting Plate. When mounted on a shop wall the large plates have a 150lb weight capacity and a 75 lb weight limit when mounted in a vehicle.
PACKOUT Mounting Plates | Best Practice Installation
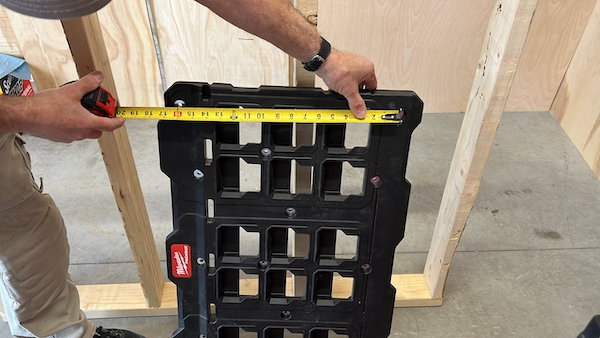
The PACKOUT shop Storage mounting plates have 14 different mounting hole locations and 4 labeled for mounting 16-inches on center for a typical wall stud mounting application. The issue that we found with these brackets is that the 30-inch size of the mounting plate does not allow for a continuous mating of plates horizontally across a wall with using just studs as anchor points.
In order to work well with all the existing PACKOUT products and their tabbed indexing system, nominal width of 10″ for the small plates and 30″ for the large plates was decided on. Unfortunately, these are not multiples of the standard 16″ stud placement and it’s not possible to index the plates next to each other as intended AND find studs that line up with the mounting holes. If joined consecutively the plate will only hit a wall stud every 4th or 5th plate and even then it not multiple studs per plate.
To mount this system securely, we recommend using one of the three best-practice methods described below: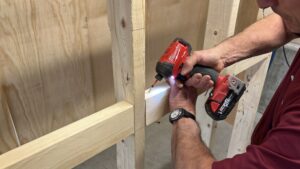
- Install Blocking
- Install horizontal wall strapping
- Install plywood backer board
Installing Blocking
This is by far the fastest, simplest, and most cost-efficient method for mounting.
Blocking is the process of installing solid framing material in between two studs, and flush with the studs. This method is best used if you are concerned about space, and the boxes projecting into the room, truck, or van. Any solid framing material can be used for blocking, such as 2×4, 2×6, 2×8, etc.
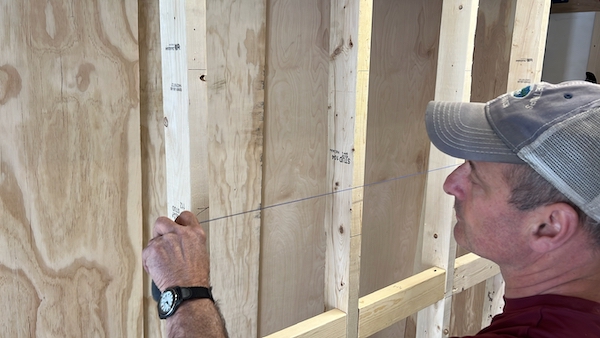
Figure out where you want your PACKOUT mounting plate to go, and which mounting holes you will use. Once you have this location, mark or snap a line horizontally across your wall studs, the length of your install.
To install the blocking, “toenail” nails or screws on each side of each end of the 2×4, along your line, ensuring that the blocking is flush with the wall studs. You will need two rows of blocking, Then mount your PACKOUT plates directly on your blocking.
Installing Horizontal Wall Strapping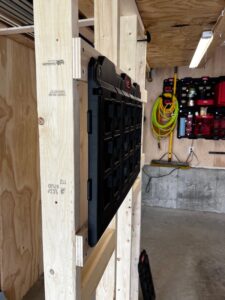
As mentioned above, installing horizontal strapping is by far the fastest and most cost-effective method for installing the PACKOUT wall plates. Figure out where you want your PACKOUT mounting plate to go, and which mounting holes you will use. Once you have this location, mark or snap a line horizontally across your wall studs, the length of your install.
Install your strapping along this wall with a minimum of 2 screws, into each wall stud, then mount your PACKOUT plates into your strapping.
Installing Plywood Backer Board [sheet-stock]
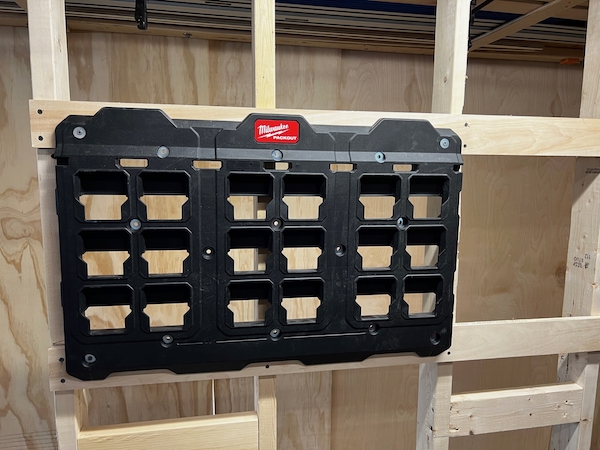
This is my preferred method because it allows you to mount the PACKOUT system anywhere along the wall and also allows you to later move it around. Additionally, it provides space for other workshop hanging tools, jigs, and just plain looks nice!
For this method, I recommend using 4×8 sheets of AC or Birch plywood and securing them to your wall studs with screws. Once installed you can install your PACKOUT system anywhere you’d like, through any of the mounting holes on the wall mount.
PACKOUT Shop Storage system | In-Use
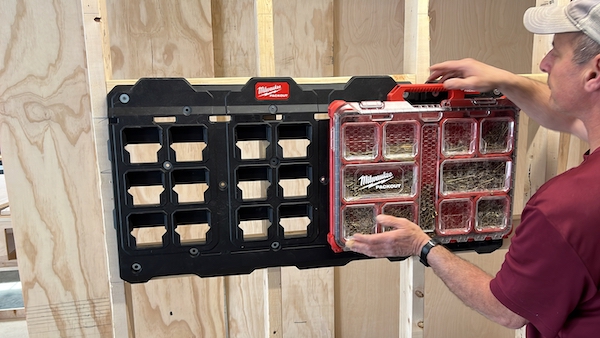
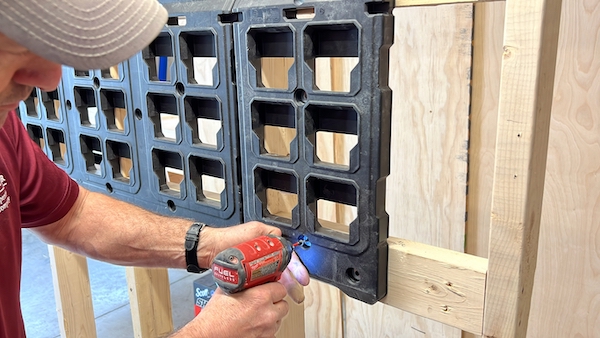
We’ve had the PACKOUT Shop Storage system mounted and functional in one of our garage workshops for a few weeks at the time of this review. We mounted multiple large plates and a few small plates on a wall of several 4×8 sheets of plywood. Once the plate was mounted with a level, the indexing sides of the plates allowed us to mount the remainder of the plates in a grid extremely quickly. We experience no issues mounting larger accessories like the cabinets or PACKOUT organizer boxes across multiple plates. The indexing system ensures accurate spacing for the mounting tabs.
With the mounting of the plates out of the way, all that was left was to add a variety of accessories to the wall. The layout of the hooks, hangers, holders, and accessories will all vary depending on your space and your needs. The best thing about the PACKOUT Shop Storage system is it completely customizable and can be reorganized at any time. In the first few weeks of use, we have reorganized our wall numerous times to optimize the efficiency of our space.
Milwaukee PACKOUT Shop Storage | PROS
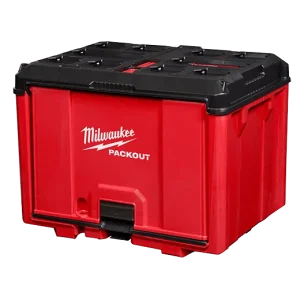
Several items available during the launch of the Shop Storage system quickly caught our eye and became favorites.
PACKOUT Cabinet
The first is the PACKOUT Cabinet, 48-22-8445. Perhaps the most versatile item of the bunch, the cabinet features mounting tabs on the back for mounting to the wall as well as stacking tabs on the bottom and top. This allows the cabinet to be quickly taken off the wall and added to a traditional PACKOUT stack. A large garage-style door on the front allows for easy access to the inside. Place a few of the cabinets in a row on your wall and they serve as a great shelf.
PACKOUT Tool Station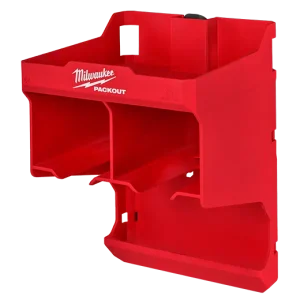
Another item that we think the folks at Milwaukee hit a home run with is the Tool Station – 48-22-8343. The tool station features two quick access tool slots primarily designed to securely hold a pistol grip style tool like drills or impact drivers.
We found the tolerances and the design of the spacings on the slots to be a sweet spot that can accept narrower tools like M12 Installation Drill/Driver as well as the much larger 1/2 Impact Drivers.
Additionally, we were able to mount some nail guns, jigsaws, and powered ratchets. The Tool Station also features a top shelf that can be used for a variety of items including charging stations and other tools that may not fit the quick access form factor.
A small tray is carved out near the bottom that is an excellent space to hold bits and other loose items associated with the mounted tools. The Tool Station does not appear to be designed for a vehicle-mounted system as the tools could slide out of the holders in a moving vehicle.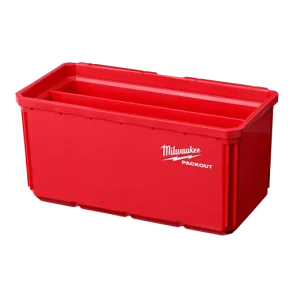
PACKOUT Storage Bin
Milwaukee has come out with new versions of their PACKOUT storage bins to take advantage of the wall mount system. The new bins are the same small and large size bins found in the PACKOUT organizer boxes but have modified tabs on one side.
These tabs allow the bins to be mounted to wall plates or even other vertically mounted PACKOUT organizers. We aren’t too sure how often this feature will be used but found it to be an insightful upgrade to the system.
PACKOUT Roll Holder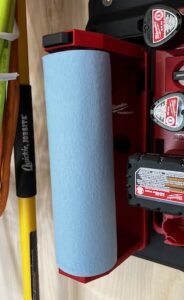
One item that immediately caught our eye is the PACKOUT Roll Holder.
A wall-mounted roll holder is a great addition to any shop for paper towels or a roll of shop rags. A simple hinged top with a pushbutton release allows for easy access and quick changing of rolls. We even placed a stack of various tape rolls for quick access.
PACKOUT M12 and M18 Battery Racks
The PACKOUT battery racks come in two different varieties, the M12 and the M18 version. Each rack takes up a single row of mounting slots and can hold 4 batteries.
Unsurprisingly the mounts are well designed with tight tolerances like their battery connections on the tools and each type indexes in with an audible click. 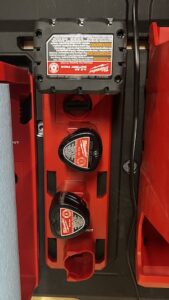
The M12 Battery Rack has plenty of room and can accept both the CP Compact and XC Extended Capacity style batteries. The M18 Battery Rack can accept 4 M18 Batteries of any size. While designed to live on the wall mounts, we couldn’t help but place a few on our mobile PACKOUT boxes!
Smartly, well-designed tool storage systems simplify the protection, storage, and transportation of tools and accessories, resulting in you spending more time working, and less time searching. ~ ROB
Milwaukee PACKOUT Shop Storage | CONS
We’ve already discussed the negative aspects of the dimensions of the wall plates and the impacts that have on mounting to a standard 16″ stud placement. We hope that future versions of the wall plates will somehow address this issue.
Long Handle Tool Rack
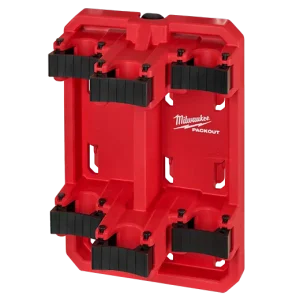
Another item that we had some issues with was the Long Handle Tool Rack – 48-22-8349. The Long Handle Tool rack is designed to hold outdoor power equipment, long-handled tools, and more.
The rack features three vertical spaces with locking cams to secure the handles in place. While the locking cams work great at holding the tool in place, we found the tolerances on the cams were designed for relatively narrow tools, likely the metal rod commonly found on Milwaukee OPE tools. Most of the items we had lying around like our brooms and brushes would not fit in the rubber grips. We’d love to see future versions of the holder accept larger or thicker gauge material.
Final Thoughts
The PACKOUT shop is neither cheap nor inexpensive. If you’re looking for a versatile, modular, and expandable storage system that is easily modified then this system is for you.
I’ve always believed that modular organizers are designed to allow for better and more secure storage, better organization, and easier mobility. I’ve also preached that being organized is key to being productive at work.
Creating a tailored, customization type, shop tool storage, will save time and work in the long run. Time saved is money earned or … more time!
PACKOUT Shop Storage | Video Review
About the author
1 Comment
Leave a comment
Disclosure
Product reviews on this site contain our opinion of a product or service. We will always strive for objectivity and transparency in our reviews. Our goal is to provide readers with honest, objective information based on our own experiences. We never have and never will accept payment in exchange for a positive review. Many of the products that we review are provided to us for free by a manufacturer or retailer. In some cases, we also have advertising or affiliate relationships with manufacturers and retailers of products and services we review. For additional information please visit our additional disclosure policies.














[…] hand tools as well as industry-leading cordless tools since 1924. Their M12 line, M18 platform, Packout solutions, and even hand tools increase productivity and are unmatched in durability for professional […]