Coping Molding
Coping Molding – GRID Apprentice Program
Hi guys I’ve partner with Milwaukee’s GRID apprentice program to walk you thru how to cope molding. Now if you’re an apprentice and want to learn more tips and tricks like this, please click the link in the description below to take you to the GRID website.
GRID Apprentice Program
It’s free to sign up, and you’ll have access to exclusive promotions and contests, you’ll have the ability to network with other apprentices from across the country, and you can check out industry articles and videos to help you kick-start your career.
Coping Molding
One of the more popular questions I’ve received from GRID members is about coping.
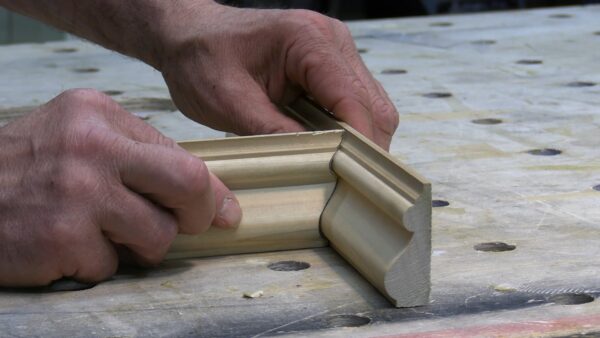
Coping is for inside corners, it’s a wood joinery technique where one molding is cut square cut and rests in the corner, while the other piece is back cut to fit the contours of the adjoining molding’s face.
Benefits to Coping Inside Corners
There are a few reasons why carpenters have always coped inside corners.
- Wood swells and shrinks with seasonal changes.
- Coped joints help cover irregularities more effectively and don’t open up as mitered joint does.
- If a coped joint opens up, the crack will be obvious when viewed parallel to the uncoped piece and nearly invisible viewed parallel to the coped piece.
- Coped miters also don’t require glue or caulking.
Mitering inside corners is not a preferred way to install the molding. The problem is most walls are not 90-degrees. When less than 90-degrees the molding shows a gap at the rear, when the corner is wider than 90-degrees the result is an ugly front gap.
Coping the molding is done by cutting out the molding back 45 degrees and allow us only to have the joint touch at the front edge – tighter gap – especially with variances
Coping Molding Two Tips
To cope a joint, is to cut precisely along the profile of the molding, but not at the customary 90 degrees. Instead, the goal is to remove enough material at the back of the workpiece that it can slide over its mating section for a perfect fit.
Coping is a little fussy, and takes some practice, here are 2 tips:
Fit The Cope Then Cut To Length
If you’re coping or mitering a joint on a piece of base, chair rail or crown, make sure that joint fits well before you cut the other end to length. I usually leave my molding piece long a few inches, cut and fit the cope, and then cut the other side to fit. This ensures that if I make a mistake and have to recut the cope or miter, I have room to do it.
Work Left To Right
As I work my way around a room, especially when running crown molding, I’ll sometimes end up with a piece that needs to be coped with on both ends, a challenge for even the best carpenters. If that happens try to plan my installation so that this last piece of trim is in the least conspicuous place. Wherever possible, I orient the coped pieces so that people entering or using the room won’t have right-angle views of them.
Coping Saw
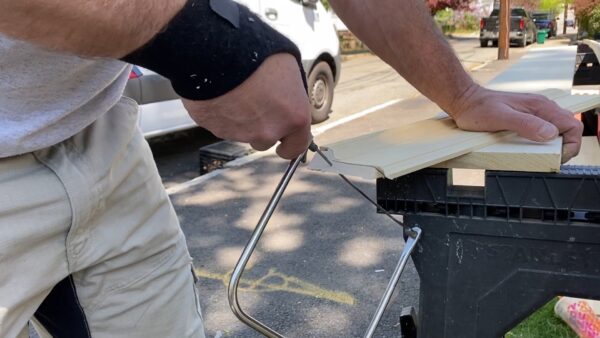
Coping can be accomplished with a specialty handsaw, called a coping saw, or a jigsaw with a Collins foot.
A coping saw has a large frame loop that lets you cut and around the molding. While it’s considered user preference, I recommend setting the blade teeth set forward to cut on the push stroke.
This video will focus on the coping saw method and we can cover the Collins jig another day.
How To Cope Molding
- Set miter saw to an inside 45 degrees, in the direction that the an inside corner would run
- Trace the profile to make the profile more visible.
- Use a fine-tooth coping saw – cut the bottom corner square
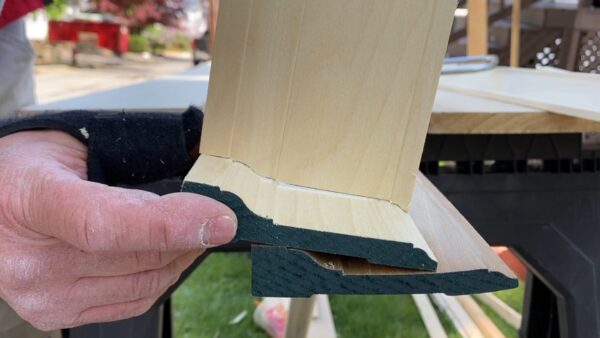
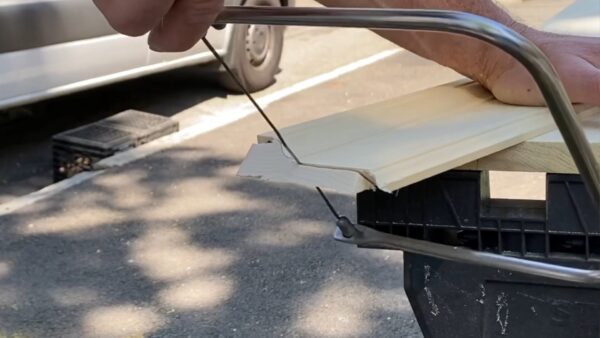
- Continue to cut along the moldings profile edge with a slight 45-degree, back-angle. This is a technique called back-cutting. The back cut ensures that there is no interfering material so the profile fits tight. The goal here is to cut the profile back to reveal the front edge of the molding profile. This will allow an adjacent molding to touch the front edge.
- Cut off the waste along the way, at sharp turns in the molding profile. Then restart the cut and follow the profile.
- When done the coped molding should have a sharp profile edge.
- Slide molding into the profile of the other molding
- Adjustment to the coped fit can be done with a back file, sandpaper or a utility knife. A grinder with a sanding disc can also be used in some applications.
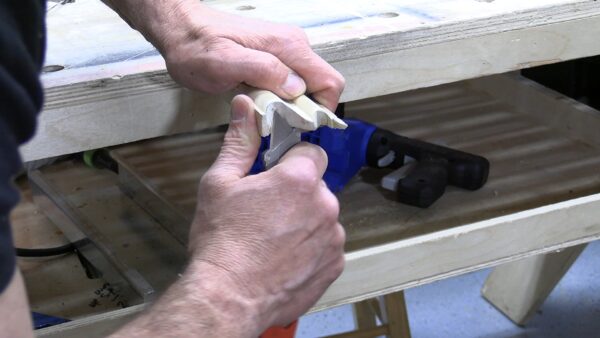
Coping your inside molding joists is a superior, professional and practical approach to molding installation.
It takes some practice and certainly muscle memory, but the result is worth it! Try them out and get some reps in. Remember to practice, discuss, and experiment with new skills and techniques to help you learn and develop.
Coping Molding – GRID Apprentice Video
About the author
Disclosure
Product reviews on this site contain our opinion of a product or service. We will always strive for objectivity and transparency in our reviews. Our goal is to provide readers with honest, objective information based on our own experiences. We never have and never will accept payment in exchange for a positive review. Many of the products that we review are provided to us for free by a manufacturer or retailer. In some cases, we also have advertising or affiliate relationships with manufacturers and retailers of products and services we review. For additional information please visit our additional disclosure policies.


