RIDGID Drill Press Review and Assembly
RIDGID Drill Press Review Model DP1550
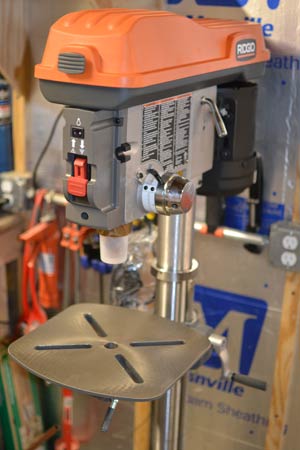
 For the past 3 months I’ve had the 15″ stationary RIDGID Drill Press in my shop and it has made a huge difference in the quality and accuracy of holes I’ve needed to drill. Like many people I relied on my cordless drill and my eye for a long time to drill accurate holes but it was time to upgrade. I thought about a bench top model but had a bit of floor space so I decided to get a larger unit. Large floor standing units have more power and can accommodate larger stock than their bench top brethren. Just like when I picked up the RIDGID Table Saw, I’m not really sure how I got along before this tool either. A drill press is such a valuable tool in the shop. If you’re here for assembly instructions it’s near the bottom of this post.
Specifications:
- Amperage: 8A
- Assembled Height: 56.69 in
- Assembled Width: 11.65 in
- Assembled Depth: 22.24 in
- Chuck Capacity: 5/8 in
- Quill travel: 3.75 in
- Max speed: 3100 rpm
- Minimum speed: 300 rpm
- Throat depth: 7.5 in
Features:
- 5/8 In. capacity key chuck accepts a variety of standard bit sizes for varied projects
- 1/2 hp induction motor is fan-cooled and totally enclosed with enough power to bore through tough materials
- 12-speed spindle with a range of 300-3,100 rpm gives you the speed you need to handle all kinds of jobs
- Left/right hub allows positioning of the crank handles on the left or right side of the head for versatile use
- Poly-V belt drive limits vibration and improves power transfer
- 3-3/4 in. Quill travel bore completely through a dimensional 4 x 4 in one pass
- Feature packed smooth actuating rack and pinion table elevation, tilting table, quick release belt tension lever, built-in work light and chuck key storage
- User Friendly handles and controls with Sof-Touch handles and knobs, high visability bevel and depth scales and indicators
- Easily adjustable depth stop
Overall Impression
I’ve been very pleased with how the RIDGID Drill Press operates. It has minimal runout and a very quality feel to it. The first day I put it together and used it I was worried that the quality wasn’t very good because the chuck wobbled. It was because I didn’t clean the mating surfaces well enough between the quill shaft and the chuck. After I pulled the chuck off and reassembled the wobble was gone.
Since that first day I’ve drilled all kinds of holes with small 1/8″ twist bits all the way up to 1-1/2″ forstner bits in oak newel posts. With 12 different speeds it’s easy to dial in the right rpm for the bit and material. There is an easy to read chart inside the cover with diagrams of which belt goes where on each pulley. It’s completely tool-less and really easy to change speeds.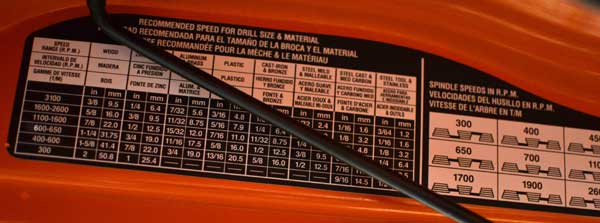
One of the best features of this drill press is the depth stop. 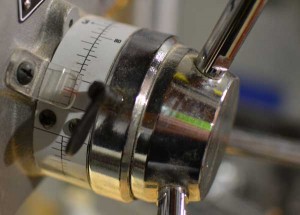 It’s located right next to the handle with a big, easy to read scale. It works both as a depth stop and a return stop. When drilling newels I set it so that I didn’t go too deep but when I have a sanding drum chucked up I set it as a return stop to keep the drum near the table. It works great.
Improvements
The only improvement I’d like to see with this tool is a square cutout in the table to accommodate wood or plastic blank. Until I build a drill press table I have to either line the bit up with the center hole in the table or clamp a piece of scrap to the table to keep bits from contacting the metal table.
Where to Buy
The RIDGID Drill Press can be found online at the Home Depot or ordered in store. At $499 this drill press is a great value. Unfortunately I’ve never seen it in any stores so you’ll have to take my word for it that it is definitely a quality tool.
Assembly
Assembly for this tool wasn’t too bad. The drill head comes almost entirely assembled with the exception of the chuck, handles, and belts. While it speeds assembly it makes the part very heavy. The instructions say to have two people but I’ll show you a trick to set it up by yourself. This tool ships from China so it has plenty of tool oil caked on most parts so have a box of rags and your favorite cleaner. Have a container of paste wax on hand too so that as soon as you clean off the oil, apply wax to keep rust away.
Step 1: Unpack. What I like about RIDGID stationary tools is that the instructions are always on top. This tool is packed very well.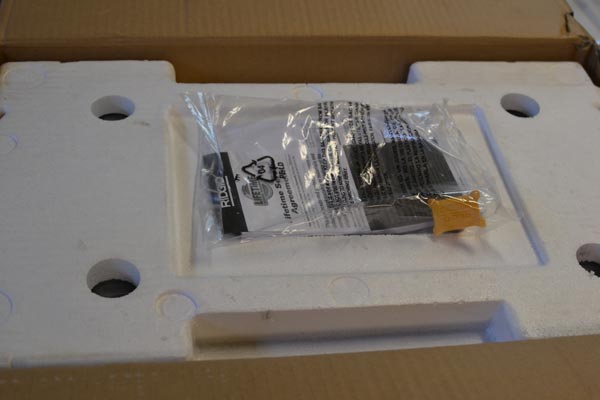
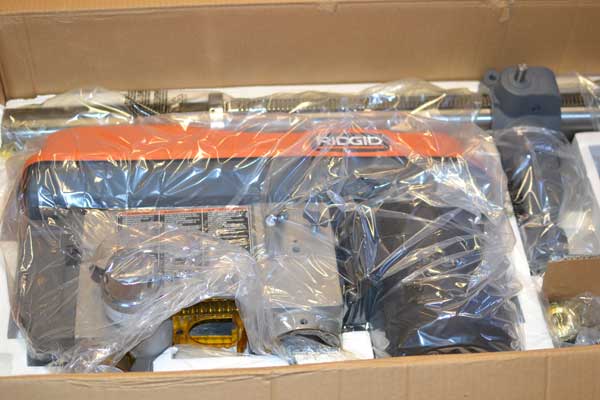
Step 2: Attach the post to the base. Now is a great time to clean the tool oil off the post and wax it up.
Step 3: Scrape the oil soaked paper off the table post and wax this too. You may have to use a putty knife to scrape it off, the stuff was like glue but it kept things from rusting on the long boat ride to the states.
Step 4: Install the table in the table arm.
Step 5: Use a moving dolly and put the drill head on it. Wheel it over to the base. Tip the base over and slide the drill head on. Now lift with your legs and stand the drill press up. That’s the trick to doing it by yourself.
Step 6: Install the idler pulley and belts.
Step 7: Install the handles. The handle assembly can be installed on either the right or left hand side. I’m a righty so I left it in it’s default position.
Step 8: Get a chunk of scrap and set it on the table. Open the chuck jaws all the way and clean the mating surfaces of both the shaft and the inside of the chuck very well. If you don’t the chuck will wobble. Use the handles and press the shaft into the chuck. Use a some pressure, it’s friction fit.
Step 9: Install the light bulb. Behind the handles is a small recess where a 60W bulb is supposed to fit. The castings are too close together though and I couldn’t get a 60W to fit. I shoved a CFL pigtail style up there and reinstalled the guard.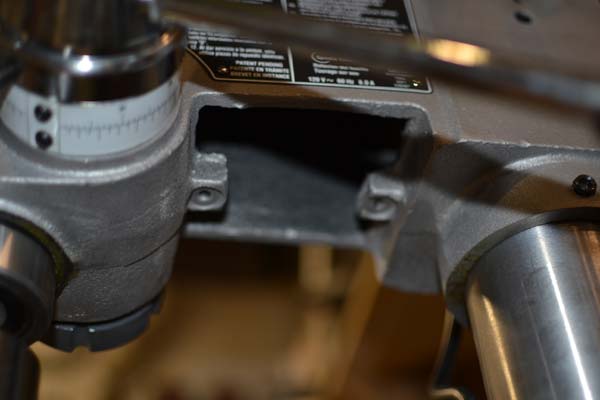
Step 10: Square the table to the quill. Use a try-square or combination square. Make sure you use a bit that is straight and spins true.
About the author
3 Comments
Leave a comment
Disclosure
Product reviews on this site contain our opinion of a product or service. We will always strive for objectivity and transparency in our reviews. Our goal is to provide readers with honest, objective information based on our own experiences. We never have and never will accept payment in exchange for a positive review. Many of the products that we review are provided to us for free by a manufacturer or retailer. In some cases, we also have advertising or affiliate relationships with manufacturers and retailers of products and services we review. For additional information please visit our additional disclosure policies.


Yours is fine. The newly upgraded model with the 3/4hp motor is not as good. They must have changed manufacturers because the quality has slipped. Chinese style manual is sometimes confusing, angle indicator in mounted upside down, parts seems lesser quality. Overall somewhat disappointing.
I started to assemble 15″ Ridgid DP.
handle to raise work table was broke in the box but still should work,just enough that you know its working. But the work table wont catch on the knotched bar, on the side of the center pole and will not go up or down. Seems like a pretty simply operation, but I’m not sure where to go now. Anyone have an idea? Thanks
I’ve had a DP15501 model for a few years. I like it. My only quibble is the drill press table. Standard clamps don’t work well.