Shop Made Tools: Router Table
Shop Made Tools: Router Table
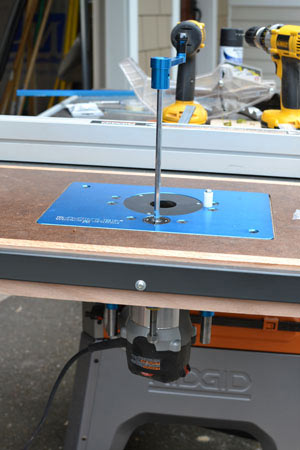 In the review of the RIDGID R4512 Table Saw I mentioned that I had built a lot of jigs and accessories. The first one I built was an extension table to fit between the fence rails. RIDGID even includes the screws and washers to mount the table. In this article I’ll tell you how to build your own extension table and then add a router lift to it. The same process works for adding just a standard router plate if you don’t want to go the full-blown lift route.
Building the extension table
The saw manual included dimensions for the table top but I did have to double check to make sure I had the spreader bar square to the fence rails. Mine was a little cock-eyed at first. I misplaced the pictures of the assembly and glue up but it consists of 2 layers of 3/4″ chip board, and a top layer of 1/4″ hardboard. I trimmed this up on the table saw 1-1/2″ smaller in length and width than what was specified in the manual so that I could frame it in 1×3 oak. I coated the whole thing with 3 or 4 thin coats of poly, mounted it up, and then waxed it just like the rest of the saw top. In the picture you can see how it is mounted. 3 screws and washers through the spreader bar and 3 through the end of the steel extension wing.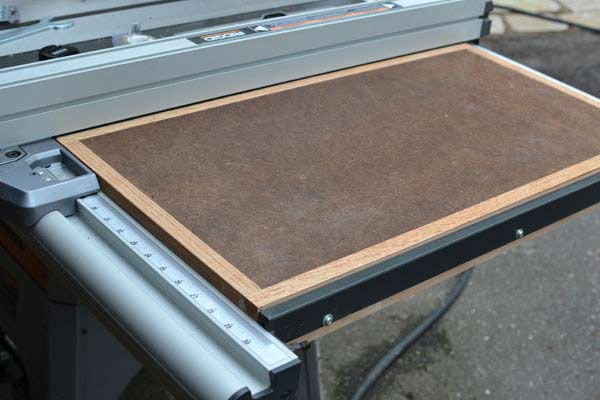
Buying a router lift
The extension table worked great just as it was but with my small shop space I decided that I could also use it as a router table. I have a mid-sized router, the Porter Cable 890 series. It seemed like a good starting point. The 890 series has a lift mechanism built into its base but I wanted my table to be able to use any motor if I decided to upgrade in the future. I looked at a few different lifts but decided to try the Rockler Router Lift FX. Again, it seemed like a good starting point. I went into my local Rockler store and the staff helped me get the lift, leveling kit, and template. Personally I think the leveling kit should be included with the lift. Also, Rockler should loan out the templates. Make them out of plastic and rent them for $20 deposit. Instead I have a MDF template hanging on the wall and $10 less in my pocket. Between a 20% off coupon and a couple gift cards I was out the door for just over $100 bucks. If you are not on Rockler’s mailing list (email and USPS), you should be because that’s where I get all my coupons.
Installation proceedure
Step 1: Attach template to top using carpet tape. Double-sided scotch tape isn’t strong enough, especially if the top has been waxed previously.
Step 2: Mount a pattern bit into your router and slowly follow the inside of the template until the proper depth is reached. I went 1/8″ + the thickness of the lift. I used the Bosch Colt trim router. Any small router is perfect for this task though.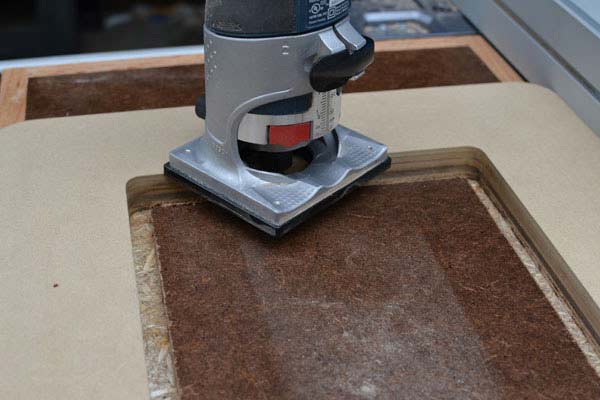
Step 3: Drill 8 holes around the inside of the groove you just routed using a 1/2″ bit. I used a Bosch Daredevil spade bit, it went really fast in the impact driver. Notice the tab marked in pencil in the bottom of the image these tabs are used to hold down the lift later.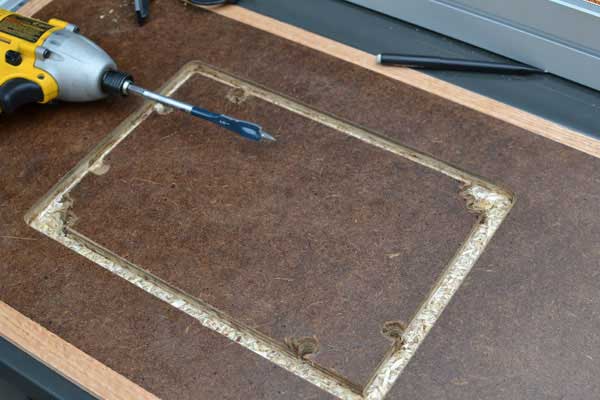
Step 4: Use a jig saw to follow the inside of the routed groove connecting the holes drilled in the previous step. This creates a 1/2″ ledge for the lift to sit on.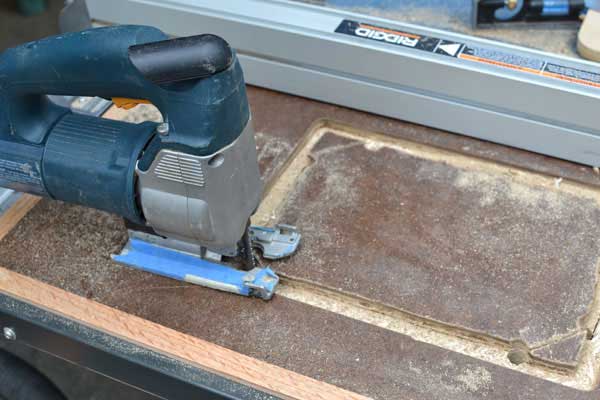
Step 5: Use a chisel the mounting tabs level with the rest of the ledge. I could have used the router for this step as well.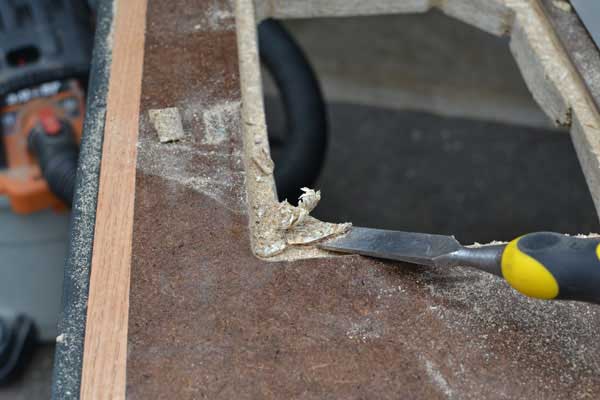
Step 6: Mark and drill mounting holes and holes for leveling screws. 11/32″ drill bit for the 1/4″-20 threaded inserts and 11/64″ drill bit for the leveling screws.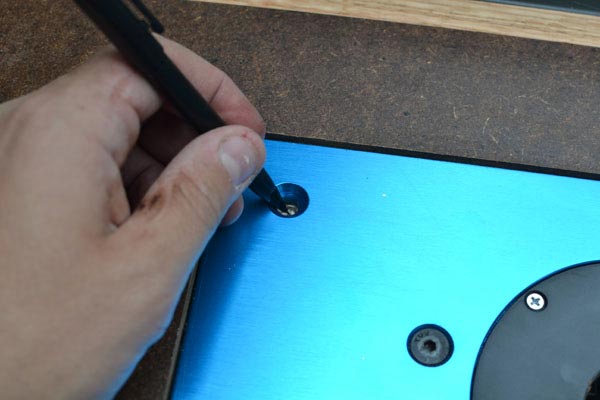
Step 7: Install threaded inserts from the top and leveling screws from the bottom.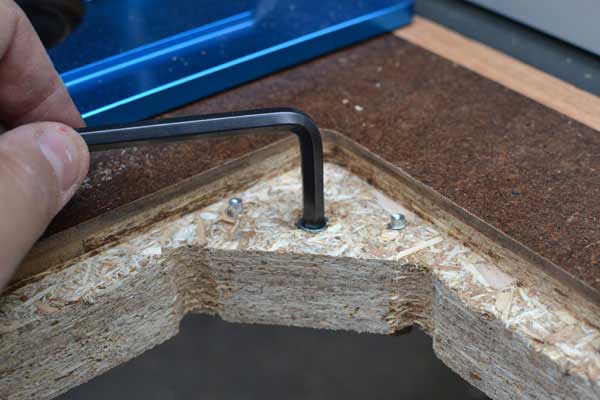
Step 8: Adjust leveling screws until top is flush and then secure mounting screws to hold the lift in place.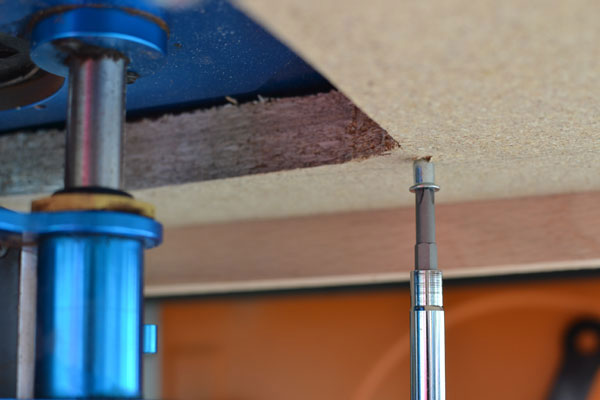
Step 9: This step is optional. I routed a groove and installed a Rockler miter track in the table to allow use of sleds and other jigs in the future.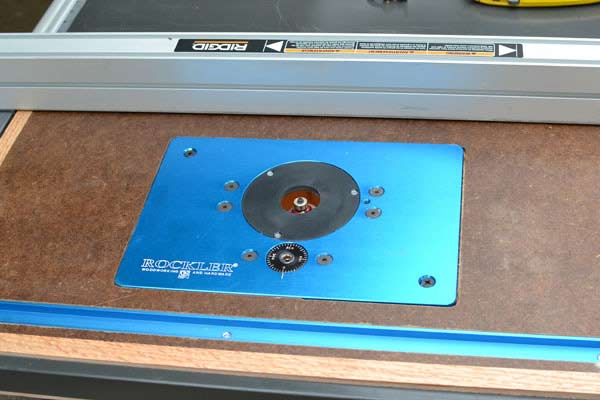
Using the table and lift
The Rockler lift also comes with a crank for raising and lowering the router and a guide pin and bushing for safely starting a route. I routed a quick ogee profile in a piece of pine and it was very fast and very smooth. I hogged out most of the material in the first pass and then cranked the lift up a 64th and finished it off. It took a grand total of about 30 seconds. Having a router table saves me so much time in my shop and I’m glad I built it. After using it for a few routes it became very apparent that a good fence and dust collection were definitely needed though. The next post in this series will be how I handled those needs.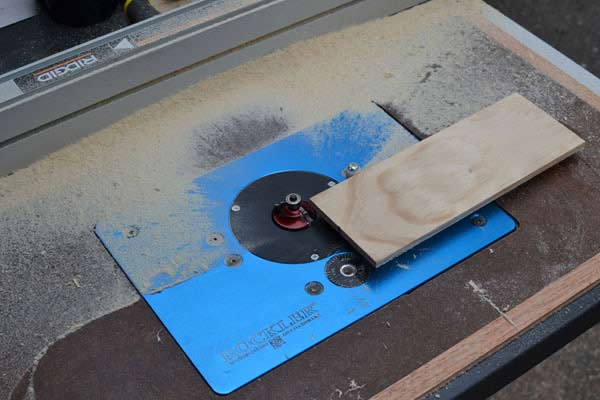
Update
Part 2 of the Shop Made Tools series is now posted. The Router Table Fence is complete and includes step by step directions with large full color pictures. Check it out and build your own!
About the author
8 Comments
Leave a comment
Disclosure
Product reviews on this site contain our opinion of a product or service. We will always strive for objectivity and transparency in our reviews. Our goal is to provide readers with honest, objective information based on our own experiences. We never have and never will accept payment in exchange for a positive review. Many of the products that we review are provided to us for free by a manufacturer or retailer. In some cases, we also have advertising or affiliate relationships with manufacturers and retailers of products and services we review. For additional information please visit our additional disclosure policies.





[…] and is the center of my shop. I’ve built a lot of jigs and accessories for it including a router table to make it even more versatile. It’s funny but I’m not really sure how I got along […]
This is a great post, I think you should turn it into a 2 or 3 part series.
Great minds think alike eh? I’m working on the second part now. It is a fence with built in dust collection. Should have it posted in the next few days. Stay tuned and thanks for stopping by!
Jeff,
Just found this and is exactly what I am looking for. I am starting to build the table tonight. I was wondering if you ever got the fence done? I have an idea of how I am going to build mine once I get that far but first things first.
Thanks.
Yeah, I finished the fence about a week after I posted this article and it is sweet. I have been so busy with other tools and projects though that I haven’t published it. I’ll get to it soon and then link it in this article as well as the front page. Thanks for reading. If you get the table done feel free to email us a picture and I’ll add it to the post. Jeff at JWilliams dot org.
Great article, thanks! Did you use the screws and washers that came with the table saw to attach the accessory table?
Yes, I did.
You realize that you would want a router table when you’re working with bigger bits of wood you need to hold on to when you are cutting them by using your router. Using the table, you know that fewer vibrations may occur and along the way, you will accomplish a much solution cut than what you might be expecting to obtain.
Bench Dog Router Table