Bosch GET75-6N 6-Inch Dual-Mode Random Orbit Sander Review
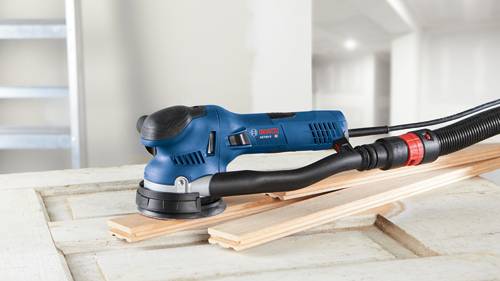
Bosch GET75-6N Sander with Turbo Mode
Bosch 6" Dual-Mode Random Orbit Sander
 Problem Looking for a Solution
Can the Bosch GET 75-6N Turbo sander help to solve my problem? This holiday season, I had many orders to make cutting boards with epoxy infills in the design or text. The epoxy fill allows the user to put food on the surface of the board or cut on the surface without worrying about food particles that might embed in the intricacies of the carving.
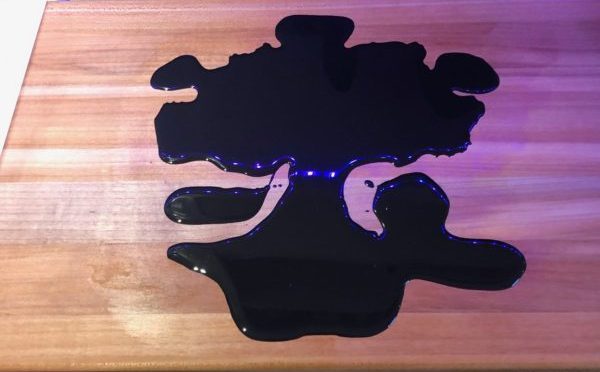
The way I make the epoxy inlays entails adding a large amount of epoxy on the top of the board. I put on excess epoxy for two reasons. First, the added amount allows air bubbles to rise more easily to the surface. Once they are on the surface, I can then eliminate the bubbles with a propane torch or heat gun. Second, the extra epoxy allows the inlay to shrink when it cures and still be above the board surface. I can then sand it down to the final finished surface.

Epoxy Inlay ready for GET75 6N
I currently use a Systems Three brand of epoxy. Over the trials and tribulations of early inlays efforts, I have learned to let the epoxy set for at least 48 hours before taking it down. I found nothing but issues when sanding the System Three materials before they are completely cured. In the beginning, I gummed up and ruined a lot of expensive sanding abrasives and occasionally had to re-cut boards.
Cured Epoxy is Tough to Sand
Letting epoxy fully cure also means it is a lot harder/stronger and a lot more difficult to grind down. My old 5” Bosch 3334 Random Orbital Sander would get the job done but it sure took a lot more time to do the work than I wanted to spend. Being the impatient person that I am, I tried using my SuperMax 19” wide belt sander with a 100 grit belt to remove the epoxy and lightly cut into the top surface.
With the SuperMax, I found that the finer pieces of epoxy inlay were sometimes ripped out of the carved relief and that the newly made 100 grit belt marks were a real pain to remove using a 5” sander. So my standard approach became to use the SuperMax to take the majority of the epoxy down most of the way but to be careful to not have the belt sander come close to the final finished surface.
That was still only half of a good solution because I still had to work away with the 5” random orbital sander to get the epoxy flat.
Bosch GET75-6N Turbo Sander – A Potential Solution
Recently, I saw an advertisement for the Bosch GET75-6N Turbo sander. What caught my attention was the tool’s features that allow it to either operate as a standard random orbital sander or switch to its Turbo mode. In Turbo mode, the Bosch GET75-6N acts more like a grinder (with a slightly eccentric orbit) that directly drives the disc and quickly removes much more material.
I was looking forward to trying out this tool as a solution for my epoxy sanding problems.
About the Bosch GET75-6N
The new Bosch GET75-6N definitely looks different compared to Bosch’s older 1250DEVS. The GET75-6N stand out features includes the side dust collection tube, slim handle, and extended length as the main visible differences. The Bosch GET75-6N has a long list of great features:
- Dual-Mode Random Orbit Sander’s turbo mode delivers 3X the removal rate of standard random-orbit action.
- It has a tapered top hand-grip with soft-grip design.
- The auxiliary handle mounts on either side of the sander for outstanding control.
- The sander features an enhanced multi-hole pad system that is compatible with a wide variety of abrasive discs.
- The random-orbit action both orbits and rotates to provide a well-blended, ultra-smooth surface finish.
- It is built with an integral pad-dampening braking system to help prevent swirl marks, plus it has a soft micro-cellular hook-and-loop backing pad.
- The die-cast aluminum gear housing with a dual-bearing pad mount reduces the tool’s vibration.
- This tool has an enhanced dust-collection system for maximum efficiency when used with a vacuum cleaner and hose.
- Large channels in the pads allow debris to be easily pulled through the vacuum port.
- Versatile hose compatibility – includes extension dust tube and VAC024 Vacuum Hose Adapter for connection to 35mm, 1-1/4 In. and 1-1/2 In. hoses
The GET75-6N Package Includes:
- (1) 6″ Dual-Mode Random Orbit Sander
- (1) Soft Backing Pad
- (1) Hex Pad Wrench
- (1) Sanding Disc 180 Grit
- (1) Removable Front Handle
- (2) Vacuum Hose Adapters
Technical Specifications:
- 6″ disc size
- 273-635 RPM
- 3100-7200 OPM (no-load)
- 4.5 mm (0.18″) orbit radius
- Separate on/off and speed controls
- 7.5A power draw
- 15″ long
- 5.5″ tall
- 6.3″ width
- Weighs 5.7 lbs.
- $299.99 at online stores.
Tool Performance
The Bosch GET75-6N did not disappoint me with its performance. From the first turn in Turbo mode, this sander is remarkable for the large amount of material that it removes. I tried out the sander on a scrap piece of plywood with a 100 grit disc attached. The Bosch cut through the first ply layer in a surprisingly short amount of time.
Interestingly, I felt as though I were using a different class of tool in comparison to a normal random orbital sander. The power translated into the amount of force that I needed to use to stabilize the Turbo sander.

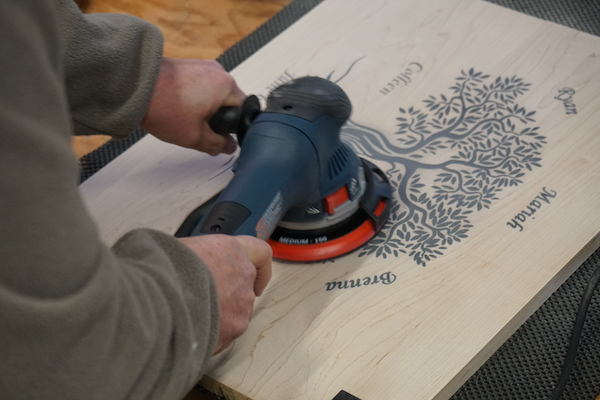
GET75 6N removing excess epoxy
I was impressed with the power and also the stability of the tool. I have always used 5” wide random orbital sanders. In this case, the width of the 6” wide sanding disc is very noticeable. It is simply a more stable tool. I think the handle and the elongated sander body add to the control that a user has.
The disc is wide enough that the user can easily run the disc into the edges of the work or into an adjacent surface. Bosch provides a guard that easily clips into the front of the sander to prevent this from happening. I was glad to have the guard, although I expect that I will be replacing that guard, whether from breakage or because I will misplace the guard.
I have focused on the GET75-6N Turbo mode. However, this tool can provide a much gentler typical random orbital mode as well. The combination of the conventional sanding mode and the wide 6” base produced some very fine finishes for me.
Sanding the Epoxy
I purchased a series of Abranet sanding discs to try out with the tool review. The discs went from 80 grit through 600 grit. I also used the supplemental Abranet mesh pad to enhance the dust collection efficiency. The extra Abranet mesh lends an extra layer of protection to the Bosch hook and loop surface. The combination of the GET75-6N sander and the Abranet discs created a very smooth, dustless and flat finished surface.
After playing around with the Bosch sander and the Abranet discs, I was ready to attack my first epoxy work. I did the rough material removal on my SuperMax flat bed sander using a 100 grit belt. Then I put on a 100 grit disc on the GET75-6N and took down the individual epoxy locations. I liked the rapid removal and the control I had with the tool to create a flat surface. Finally, I used the sander in a random orbital mode to complete the remaining grit levels until I was at a 600 grit finish,
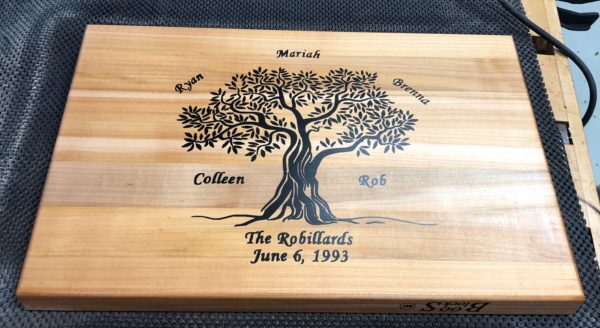
The finished piece was exceptionally flat and smooth. I also saw no evidence of tool marks or any other tell-tale signs of the finishing process. To finish this piece, I used a hand-rubbed oil finish and it came out perfect.

I certainly found an optimal solution to finishing epoxy inlay work.
In summary, the Bosch GET75-6N has a reasonable cost of $299 and a performance level that far exceeds its cost. The tool is easy to use and is stable on finished surfaces. I look at all of these items and I conclude that the Bosch GET75-6N is a great value. The GET75-6N will have a place in my shop for a long, long time. The Bosch GET75-6N is an impressive performer. I think any user will benefit from having this tool in their shop.
Bosch Bosch 6" Dual-Mode Random Orbit Sander
About the author
8 Comments
Leave a comment
Disclosure
Product reviews on this site contain our opinion of a product or service. We will always strive for objectivity and transparency in our reviews. Our goal is to provide readers with honest, objective information based on our own experiences. We never have and never will accept payment in exchange for a positive review. Many of the products that we review are provided to us for free by a manufacturer or retailer. In some cases, we also have advertising or affiliate relationships with manufacturers and retailers of products and services we review. For additional information please visit our additional disclosure policies.


I bought a Bosch GET75-6N to sand a boat bottom. It did a great job in both modes. The pad broke about an hour into the work, a problem I shared with more than a few other GET75-6N owners. I fixed it by using a couple pop rivets to hold the pad together. Poor design and lack of materials knowledge (plastic). A “new” tool doing several jobs, easy fix. All’s forgiven. What wasn’t even close was the way Bosch “customer support” blew me off with; ‘new pads will be available in August’. Really? It’s March! And, I trying to get a boat in the water. Amazon customer service tried really hard to find a solution. Turns out the product nomenclature and part numbers are very tricky to navigate. It’s September and no new sanding pad(s). Bosch makes a soft, medium and hard in theory. I wrote notes on both the Bosch and Amazon websites to let buyers beware.
What brand sanding disk are best to use with the Bosch get75-6n do I use an 5 hole, 8 hole, 17 hole didn’t really see anything on the wedsite
I would be sanding just wood
I like both the Mirka sanding disks and the Festool disks. Both are mesh-style and need a pad between the disk and the sander rotating plate. That way the # of holes does not matter. I have found that type of system to be a superior dust control – especially for wood sanding.
I like both Norton and 3M. Don’t be fooled by price. The cheap sand paper is junk. A little research will show you why .
Can anyone tell me how to get the old pad off the GET75-6N?? I’ve tried both clockwise and counter and the Allen bolt in the middle will not break loose!
This is what the manual says: To change backing pad, hold pad firmly and turn screw counterclockwise with5mm allen wrench provide.
What is the arbor size?